Home     About     Follow
Showing posts with label Decorations. Show all posts

Tuesday, November 27, 2012

Bridal Shower Bliss!

I am so excited to be here right now! Today is the day! Ok so remember my beautiful friend that was engaged a few post back!? Well she is now a married woman! Seriously guys they are adorable! They live in my apartment complex and I go over there all the time and just fall in love with them because they are thee cutest newlyweds ever! 

Anyway! Im getting carried away! So me. Ahem.. Her Maid of Honor. Threw a gorgeous shower for her! {With the help from my wonderful amazing friends!} Like seriously it was adorable, people were talking. 

The theme for this shower was... well... Pinterest. 
I basically got cheap stuff at goodwill {on half off days of course} and booked marked a dozen {incredibly easy} DIY projects and went to work!

{Old picture frame turned into a chalkboard}
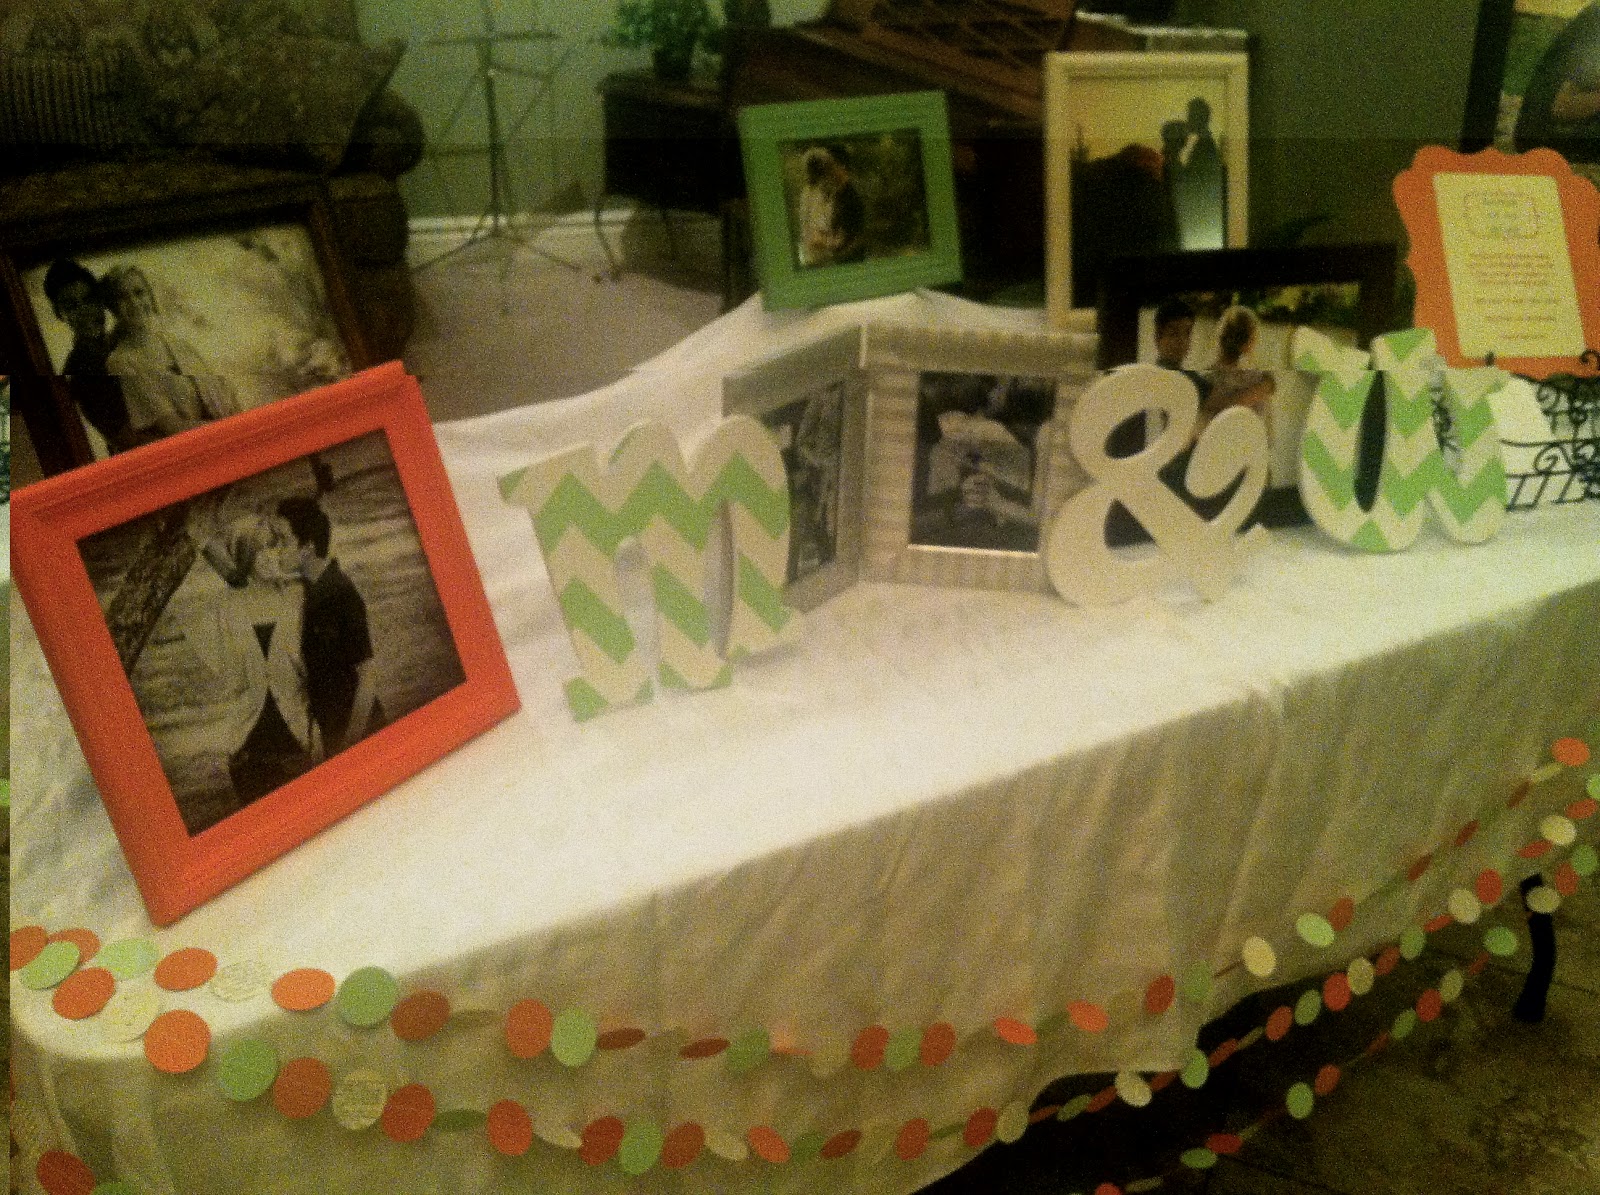
{Front display table overflowing with pictures of the cute couple! Got all the frames at Goodwill or they were donated}

{Got these wooden letters at Hobby Lobby for $1.50 each {{half off}} and painted the chevron pattern myself}

{My super talented Alayna made an incredible Letters to the Bride book. Wish I would of got a picture of it! It was filled with cute quotes, pictures, advice, and letters from those who were close to her}

{A 16x20 print at Costco is only $6!}


{The food tables}

{Got these Wooden Plaques at Hobby Lobby for just under a dollar each {{I wish they would have been half off!}} and made them into chalkboards for cute little labels}

{More chalkboards for the dessert table!}

{Cake Stands. For the tops we used stovetop burner covers, trays, a cutting board, and tart pans all from Goodwill and the Dollar Store}

{Homemade cakes by yours truly! This chocolate and mint one was to die for! I did a frosting technique that is usually used on cupcakes... and it turned out fabulous on the cake!}


{My favorite! They are just so cute and perfect!}

{This monster! Adorable... But extremely heavy!! It was a little hard to get up, but once we did it made the shower!}

{Burlap Banner. I saw a picture of one of these somewhere and fell in love! Basically you cut triangles out of burlap and use stencils to paint the letters, we added colored card stock to the backs for a pop of color and to make the burlap more sturdy. The flags are attached with clothes pins which I love because that means the letters are interchangeable and I can reuse it!}

{Paper Garland. We put these in front of all the tables, I honestly love these! And they were so easy to make!}

 The shower went great! 
I had to snap a pic of Whitney showing Marco all the stuff they got! It was just too cute!

Easy As 1, 2... That's It! {Paper Garland}

I. Love. This. I love it! Its just the right touch for ANY event and its E-A-S-Y! 

Step one.

Collect card stock in the colors that you want along with an old book that you don't mind ruining forever.

Step Two.

Grab a circle cutter and and an eager volunteer.
{preferably one who is crazy and will make you laugh the whole time} 

Step Three.

Cut your heart out! Seriously cut out a million! 

{I mean have your volunteer cut out a million...}

Step Four.

Sew those bad boys together!

                           
 {AKA... The most fun you'll ever have! The sewing machine will do most the work, you just have to feed it.}

{Step Five: Make sure your volunteer doesn't get distracted...}

 Anddddd that is it! What did I tell ya?? Easy.

It's the Simple Things {Yarn Bottles}

Guys! I've been dying to make one of these! FOR-EVVV-ER! I finally got around to it, and I'm probably gonna make 100 more! Becauseeee it's super duper easy and FABULOUS!!!!

 {Glue. Bottle. Yarn.}
{Had. Had. Had.}

 {Basically all you do is wrap the bottle in yarn. Self explanatory... Getting started is a little tricky. I put a strip of glue at the base of the bottle and wrapped a single layer and let it dry completely. Then I just kept wrapping, stopping every once in awhile to add a drop of glue here and there. }

{I wrapped it twice because there was little mishaps and gaps}

{Don't ya just love the way it looks?!}

Then I just added a bright little flower and called it art!

My shelves are almost done!!! 
Feel free to give me something to put on my remaining empty shelves... It's been a hard long battle with these little stinkers! 

Total cost: $0
This project is done did!!!!
{Tip: Save your bottles! The bottle I used was a lemonade bottle! SoBe, beer, wine, ect. would all be great candidates!}

Sunday, June 17, 2012

Ruffles Out. Chevron In!


Look at this!

LOOK AT THIS!

Fabulous right!? I remember my first time seeing one of these... Ahh.. good times.  

Now you see.. a few months ago, it was Ruffles! Ruffles! Ruffles! But let me tell you somethin.. Ruffles out! Chevron in!!! I love love love lovvvve it! The pattern is everywhere! Including my Pinterest boards! {Funny... I'm POSITIVE I said this exact thing about a month ago only I was talking about ruffles!!!}

So here we go!!
First we start with the flower. Which is made by cutting tonsss of petals out of felt!

NEED:
Scissors {Duh..}
Some kinda fabric glue {I used hot glue, I think that's best because it will set faster}
Felt sheets {I used 4 per flower}
A bit of thin cardboard {from like a cereal box or something}

To start, cut your felt into strips {2.5 inch, 2, 1.75, 1.5, 1} Then cut your strips into 2.5 inch, 2, 1.75, 1.5, 1 squares. After you got your squares start making petals outta them. I wanted a bigger flower so I did 5 petal sizes, it was about 8 inches in diameter.

To make the petals cut each square into a rounded petal shape, with a wide base and a pointed tip.

 
{I made 'master copies' of each size because I wanted all of them to be the same because I'm OCD.. And because I felt it would be easier because I was planning on making three!}

So after the petals cut a 4 1/2 inch circle outta cardboard then a felt circle a bit bigger than the cardboard to cover it.

Start gluing the petals on, starting with the largest.

Notice that the space between the first and second row isn't a big one. You want to overlap them as much as you can. You also want to make sure you have a good space in the middle when you are all done.


It should look somethin like this!

For the center I used a rounded button.
I used a 12x12 piece of wood, you coulddd use a canvas.. but I figured a piece of wood would be cheaper! It was love at first sight with this fabric! Isn't it a beauty!? I just knew I wanted it in my house!
{Anyhow... I basically just stapled the fabric on the back of the wood and hot glued the flower in the center.}

{They make me soooo happy!}
Now here comes some creative geniusness! I used pop tops to hang them!
I screwed a screw through the bottom hole and bent the top half for the nail to hang on.

There is seriously nothing better than the feeling of being done with a project!

...except it goes away quickly when you turn around and see the big mess you have to clean up.


Anddd that's it! I'm really happy with them! It didn't take me a long time so that is always a plus {I usually spend months on a project} I've gotten a lot of complements too, always rewarding(:
I love the yellow one! It started a whole new color scheme in our living room/dinning room area! We are starting to experiment with colors other than red! Which is exciting!