Home     About     Follow

Friday, December 21, 2012

A Little Thing I'd Like to Call Christmas Crack

Guys. Yumm.
This stuff is AHHHHmazing! 
So good.
Incredible.
Irresistible.
Andddd not that bad to make!

I needed something cute and Christmassy to give out to those who I adore! And I came across these lil beauties and was like… yup.  

Tutorial time!! But first... a story.

So I came home from the store {if I learned one thing today its don't go to Wal-Mart the weekend before Christmas.. Just don't.} and I realize need DOUBLE STUFFED Oreos to make Oreo pops! I got regular. So I had to go BACK to that crazy place and get more Oreos. 
{I was not happy} 
And then I had all these extra Oreos! And I was not about to let those go to waste! Or myyy waist!! So I made regular {Not as adorable} plain ol' chocolate covered Oreos. 


{But it ended up being good, because since I had so much extra I wrapped them up and gave them to my little swimmers! And they were a huge hit!}

Christmas Crack Oreos!
{Pops&Regular}

Need:
    EDOUBLE STUFFED Oreos
    EMelting Chocolate {I used a pound per Oreo package}
    ECandy Canes {Like 3 per package}
    ELollypop Sticks {I used 6 inch ones}

Separate all the Oreos
 {These are the regular Oreos {before I knew I needed double stuffed!} the double stuffed separated a lot cleaner!} 


Use one of your lollypop sticks to create a groove like this...

Melt your chocolate


Add a good amount of chocolate on the half without cream. 
 Dip your stick in the melted chocolate and place it in the grove and push it into the cream, then squish the halves together.

Freeze the pops for 10-20 minutes {Crush your candy canes while they are freezing, I used a blender}


If your Oreo breaks while you are separating them don’t you worry! Mend the two halves with chocolate! {Chocolate covered Oreos are very forgiving!}


To dip the Oreo in the melting chocolate I just dropped one side in then covered the other side with a spoon 
 {This is just a regular covered Oreo, but its basically the same thing whether you’re covering a pop or not}


Lift out of chocolate and shake off extra chocolate over the bowl
The lollypop sticks make covering them in chocolate a breeze, because you don't have to grab the Oreo out of the chocolate and ruin the smooth chocolate coat {or burn your fingers a hundred times.}
If you are making them without the sticks just fix them with a little extra chocolate .
All better!


Place onto wax paper and sprinkle with crushed candy canes.

Andddd you’re done!


Just freeze them until they’re hard. 

For the pops I individually wrapped them in cake pop bags and tied them with holiday ribbon

And with the regulars I wrapped in goodie bags! The ribbon just makes them 10x cuter! I love it! 


Well I hope I didn’t post this too late to make your holiday goodie list! Because I’m not joking when I said they are delicious! And everyone loved them!
EIOKJHGFDCBNM
Merry Christmas!

Friday, December 14, 2012

Just Another Thing Under My Belt...

Don't you just love saying DONE!? Love it so much that you throw your hands up and sing 'doooooneee!!!' and do a little dance?! Or... is that just me? I love it! That feeling you get after finishing a project is just too good!! {Especially when it's been sitting on my living room floor screaming... FINISH ME! For the past month!} 

Here they are... my pride and joy! My big accomplishment! My proud moment!
   

My mom is always getting us random things she finds at Goodwill or garage sells so about a month ago she found these matching wooden mirrors for $5 I think {P.S. I've been dying to find something to go on the big ugly empty space above my couch!} So you can you can see why I was excited when I figured out what I was gonna do with them!

They were originally tan so I started by painting them white.

I got a printable chevron template from {Billie Monster} and used that to measure where I taped off.
There is seriously nothing I can tell you to make taping it easier! It is just something you have to learn by doing it and experimenting! its a little hard at first, but it does get easier over time! By my second mirror I was pro!


Once I was all done I checked all the edges to make sure they were good and pressed down, then I spray painted the whole thing.


I let it dry and then peeled the tape off, it turned out beautiful!


Im just happy I got something on that wall, it's barrenness was driving me nuts!
{My walls are complete!! Except Im probably gonna paint the center circle thing red... Only because I can't just be happy and move on... }


Tuesday, November 27, 2012

Bridal Shower Bliss!

I am so excited to be here right now! Today is the day! Ok so remember my beautiful friend that was engaged a few post back!? Well she is now a married woman! Seriously guys they are adorable! They live in my apartment complex and I go over there all the time and just fall in love with them because they are thee cutest newlyweds ever! 

Anyway! Im getting carried away! So me. Ahem.. Her Maid of Honor. Threw a gorgeous shower for her! {With the help from my wonderful amazing friends!} Like seriously it was adorable, people were talking. 

The theme for this shower was... well... Pinterest. 
I basically got cheap stuff at goodwill {on half off days of course} and booked marked a dozen {incredibly easy} DIY projects and went to work!

{Old picture frame turned into a chalkboard}

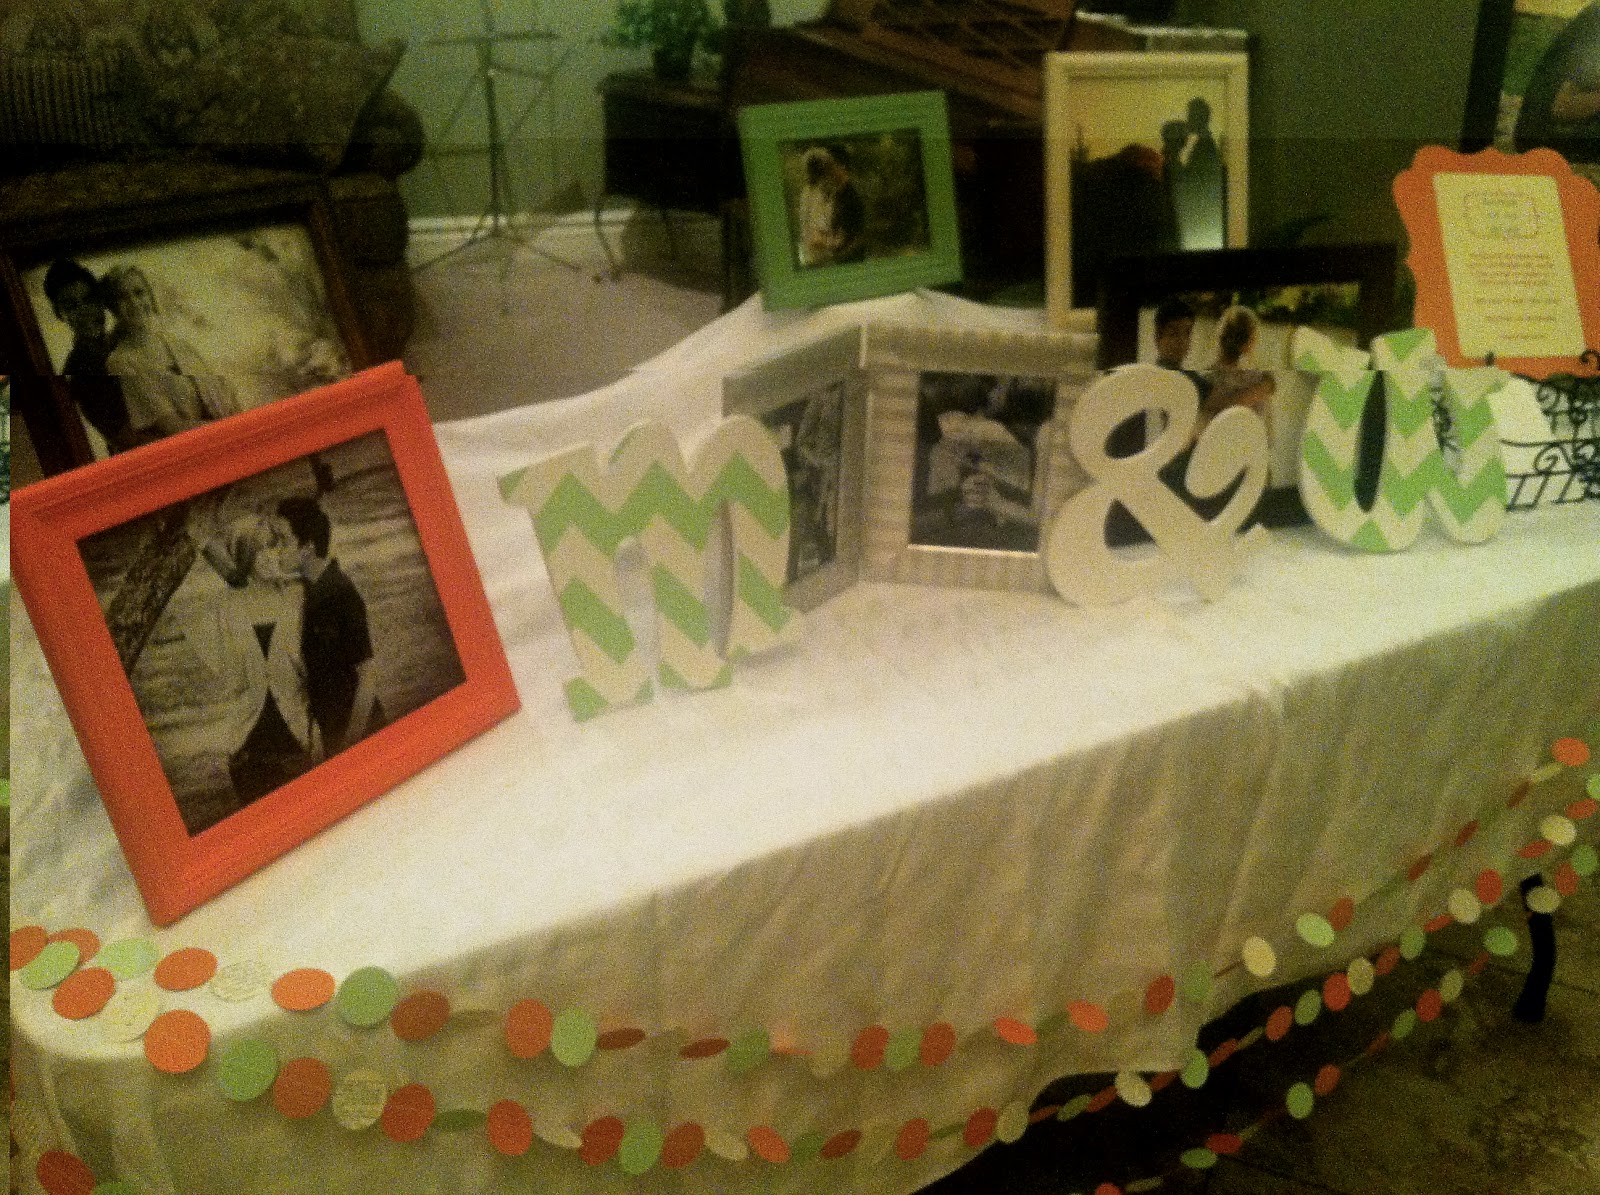
{Front display table overflowing with pictures of the cute couple! Got all the frames at Goodwill or they were donated}

{Got these wooden letters at Hobby Lobby for $1.50 each {{half off}} and painted the chevron pattern myself}

{My super talented Alayna made an incredible Letters to the Bride book. Wish I would of got a picture of it! It was filled with cute quotes, pictures, advice, and letters from those who were close to her}

{A 16x20 print at Costco is only $6!}


{The food tables}

{Got these Wooden Plaques at Hobby Lobby for just under a dollar each {{I wish they would have been half off!}} and made them into chalkboards for cute little labels}

{More chalkboards for the dessert table!}

{Cake Stands. For the tops we used stovetop burner covers, trays, a cutting board, and tart pans all from Goodwill and the Dollar Store}

{Homemade cakes by yours truly! This chocolate and mint one was to die for! I did a frosting technique that is usually used on cupcakes... and it turned out fabulous on the cake!}


{My favorite! They are just so cute and perfect!}

{This monster! Adorable... But extremely heavy!! It was a little hard to get up, but once we did it made the shower!}

{Burlap Banner. I saw a picture of one of these somewhere and fell in love! Basically you cut triangles out of burlap and use stencils to paint the letters, we added colored card stock to the backs for a pop of color and to make the burlap more sturdy. The flags are attached with clothes pins which I love because that means the letters are interchangeable and I can reuse it!}

{Paper Garland. We put these in front of all the tables, I honestly love these! And they were so easy to make!}

 The shower went great! 
I had to snap a pic of Whitney showing Marco all the stuff they got! It was just too cute!

Easy As 1, 2... That's It! {Paper Garland}

I. Love. This. I love it! Its just the right touch for ANY event and its E-A-S-Y! 

Step one.

Collect card stock in the colors that you want along with an old book that you don't mind ruining forever.

Step Two.

Grab a circle cutter and and an eager volunteer.
{preferably one who is crazy and will make you laugh the whole time} 

Step Three.

Cut your heart out! Seriously cut out a million! 

{I mean have your volunteer cut out a million...}

Step Four.

Sew those bad boys together!

                           
 {AKA... The most fun you'll ever have! The sewing machine will do most the work, you just have to feed it.}

{Step Five: Make sure your volunteer doesn't get distracted...}

 Anddddd that is it! What did I tell ya?? Easy.